Potassium deficiency in our cucumbers
We have a potassium deficiency in our garden on cucumbers that needs addressed. n this post, I will show you how to identify and treat this deficiency in your own garden. We will describe the visual symptoms, show you a picture, and explain how to correct the deficiency.
Visual indication of potassium deficiency in cucumber plants
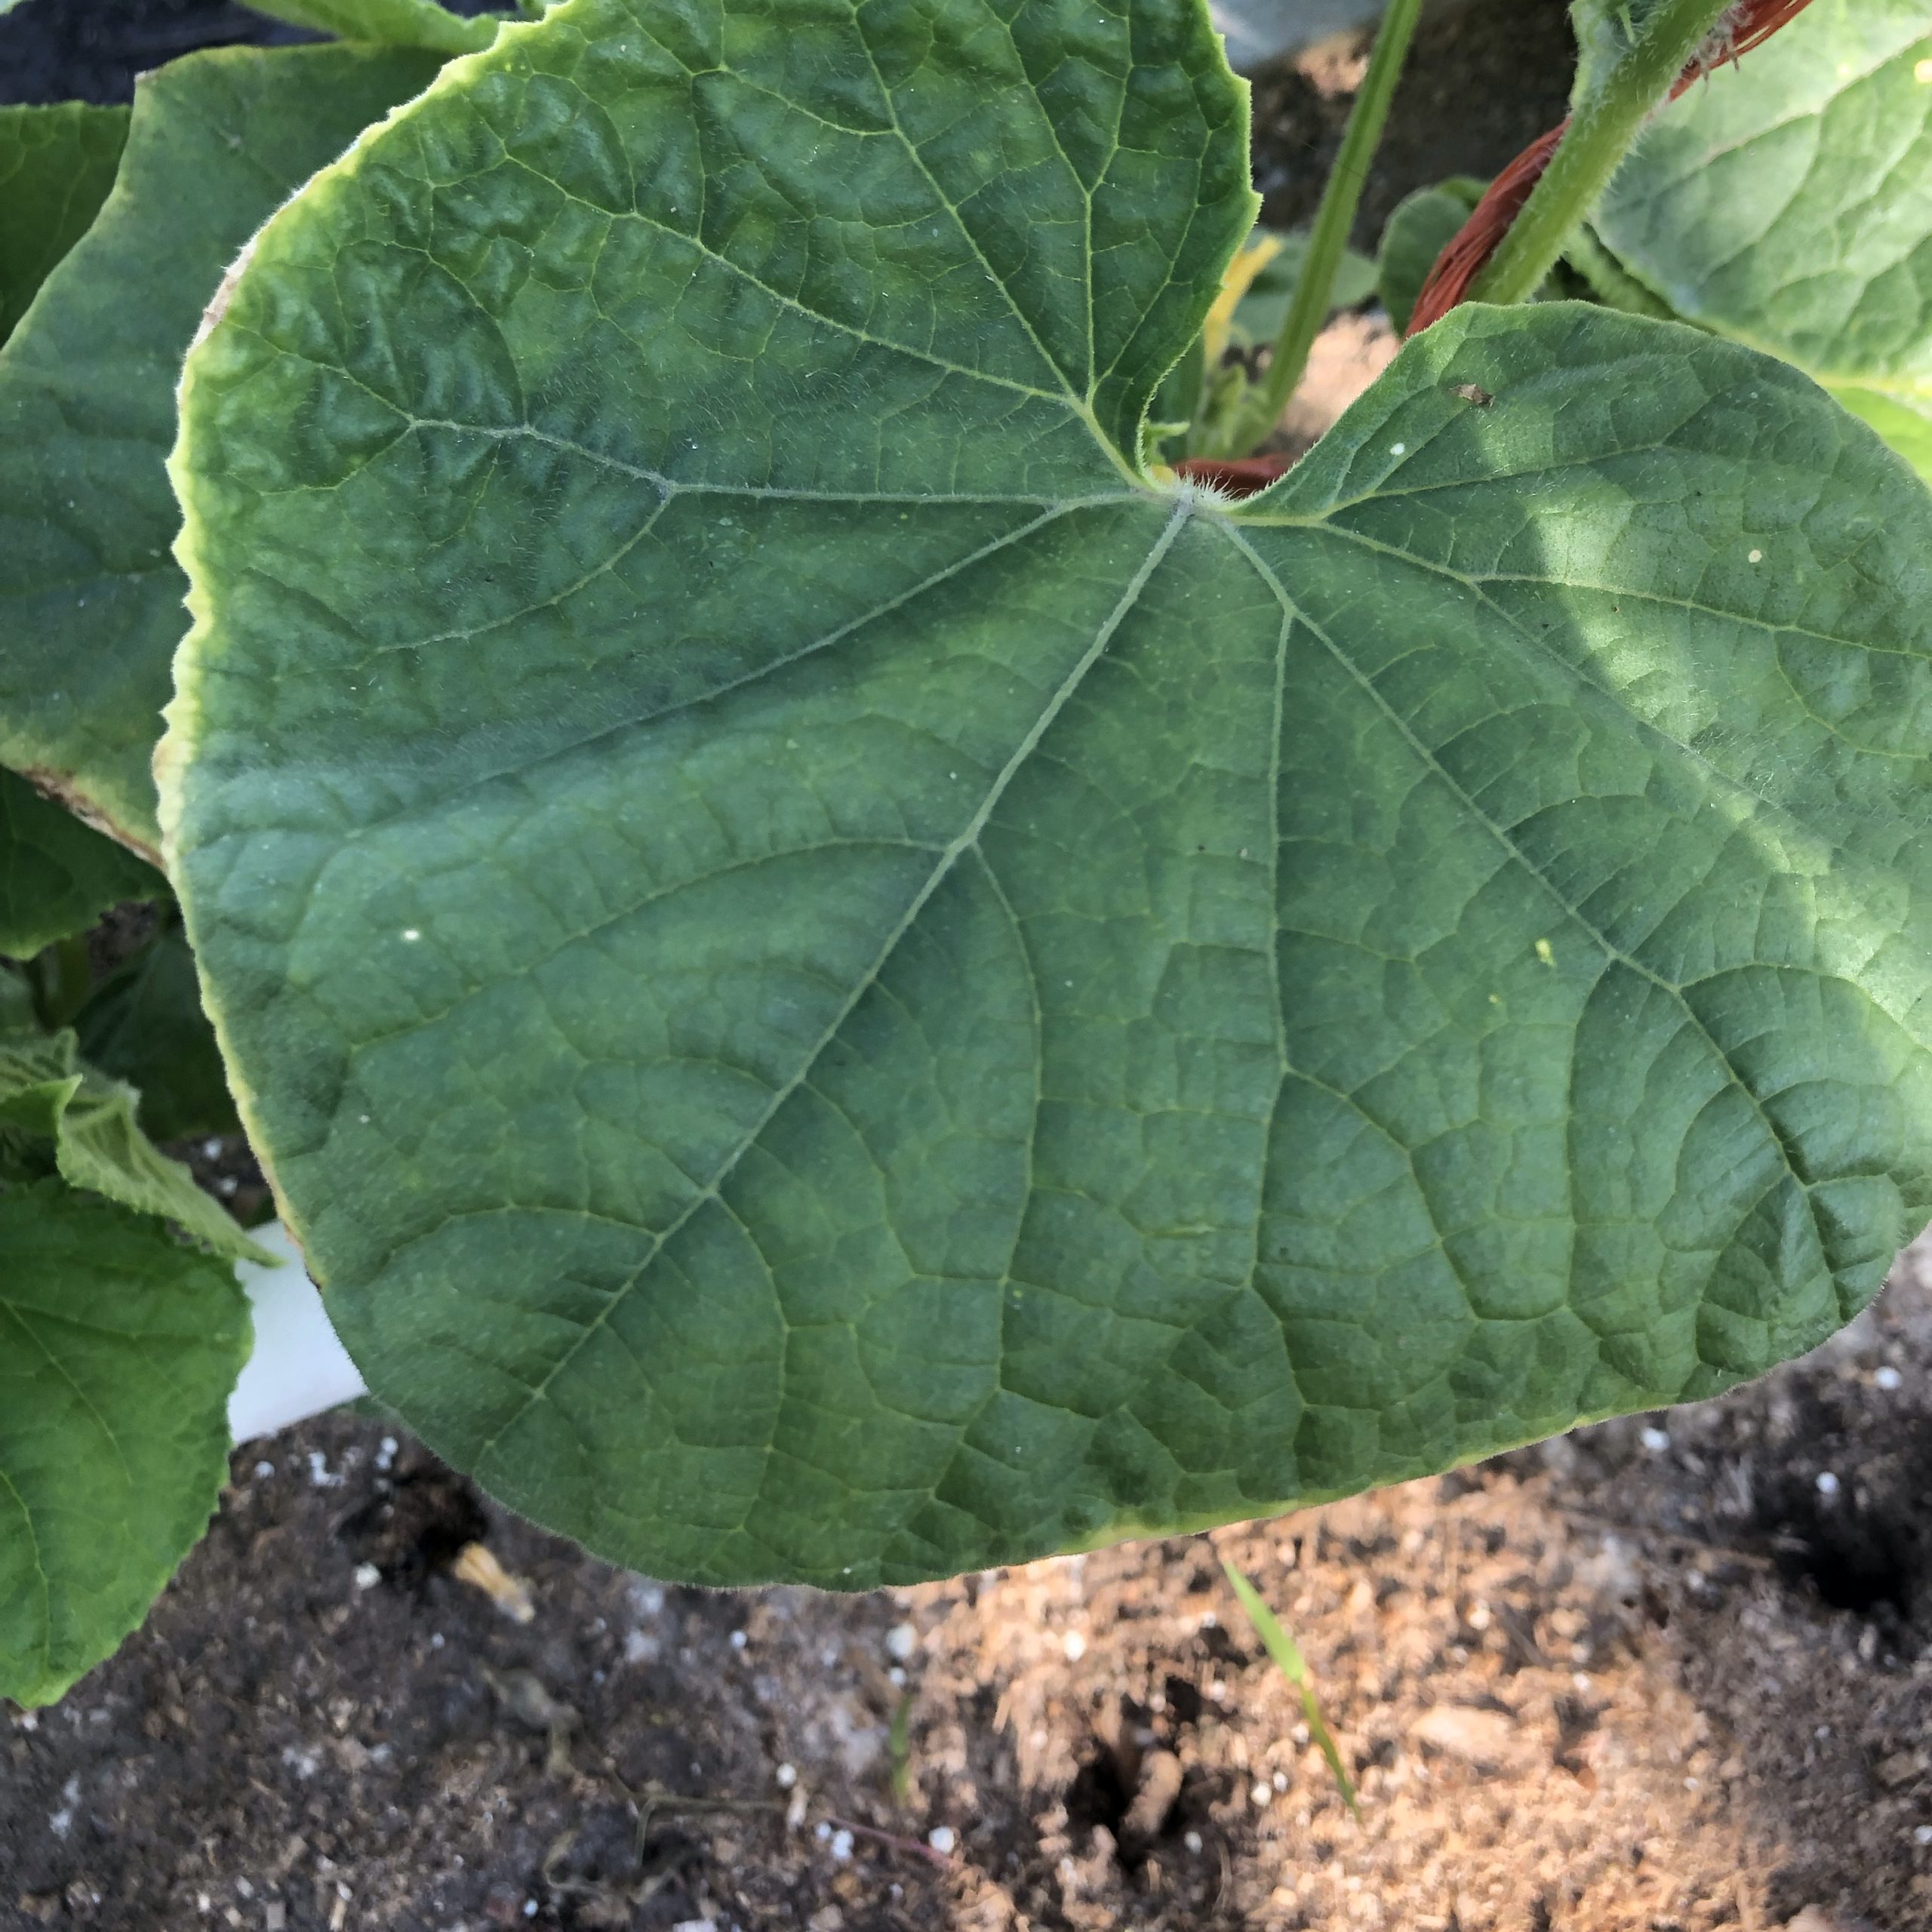
Early visual symptoms of a potassium deficiency in cucumbers is a yellowing of the leaf along its edges. It is a distinct yellowing and is easily identifiable once you know the symptoms. In the picture below is an example of early symptoms of this deficiency in a cucumber leaf.
If left untreated, the symptoms of the potassium deficiency will get worse. In advanced stages the yellow edge of the leaf will become necrotic. White dots will begin to appear in the leaves. Young leaves will be come crinkled. You will also see tears in the leaves. Ideally the corrections are made in the early stages of the deficiency.

How to correct potassium deficiency in cucumber plants
Correcting these deficiencies is easy to do. Simply apply muriate of potash (0-0-60) at the rate of 1/2 ounce per linear foot in the row where the deficiency is seen. Water the potash in well with a watering wand. It may take a week or more before you can determine if the deficiency was corrected.
Avoid slow release potash
Some companies offer plant nutrients in a slow release formula. Avoid slow release potash if you are trying to correct that problem in your cucumber plants. Your cucumbers need those nutrients to correct those symptoms now, not in a few weeks. The packaging will indicate if it’s a slow release product.
Weekly feed tips for your garden
Today Ive got a few tips on applying weekly feed fertilizer to your garden that will help improve your gardening experience. These tips on applying weekly feed to your garden will make things easier for you and help to make your plants healthier. Check out these tips for applying weekly feed to your garden and let us know if it helps you. Have any of your own tips? Share them in the comments,
Make sure your fertilizer is mixed before you go to the garden
Each week before I go to the garden I make sure the nutrients in the weekly feed are mixed well. With the lid on my bucket securely, it gets tipped end over end a few times. This redistributes the smaller micro nutrients and Epsom salt through the fertilizer. If you don’t do this, the micros and Epsom salt will settle to the bottom of the bucket and won’t get to your garden in the necessary amounts.
Applying weekly feed to garlic and onions
For most crops, the weekly feed is applied down the middle of the growing area. With onions and garlic you do not have that open space in the middle. (See spacing in this topic.) With garlic and onions just scatter the fertilizer over the entire growing area and water it in well. We don’t notice any type of fertilizer burn from it coming in contact with the plant. If you are worried about fertilizer burn simply water with your hose and a watering wand.

Water weekly feed into grow boxes by hand
Weekly feed that is applied to grow boxes must be watered in on day one with a watering wand. The automated watering is insufficient to thoroughly wet and get the nutrients into the growing medium. You can resume using your automated watering, if you use it, until your next feeding day. If you use only your automated watering system not all the nutrients will dissolve and be available to the plants. This can lead to hidden hunger and nutrient deficiencies.
Soil beds can be watered normally
Weekly feed applied to soil beds can be watered in with the automated system. Because the bed is watered until there is standing water the nutrients are able to dissolve. You do not need to water the weekly feed in by hand like you do with a grow box.
Prune in advance of applying weekly feed
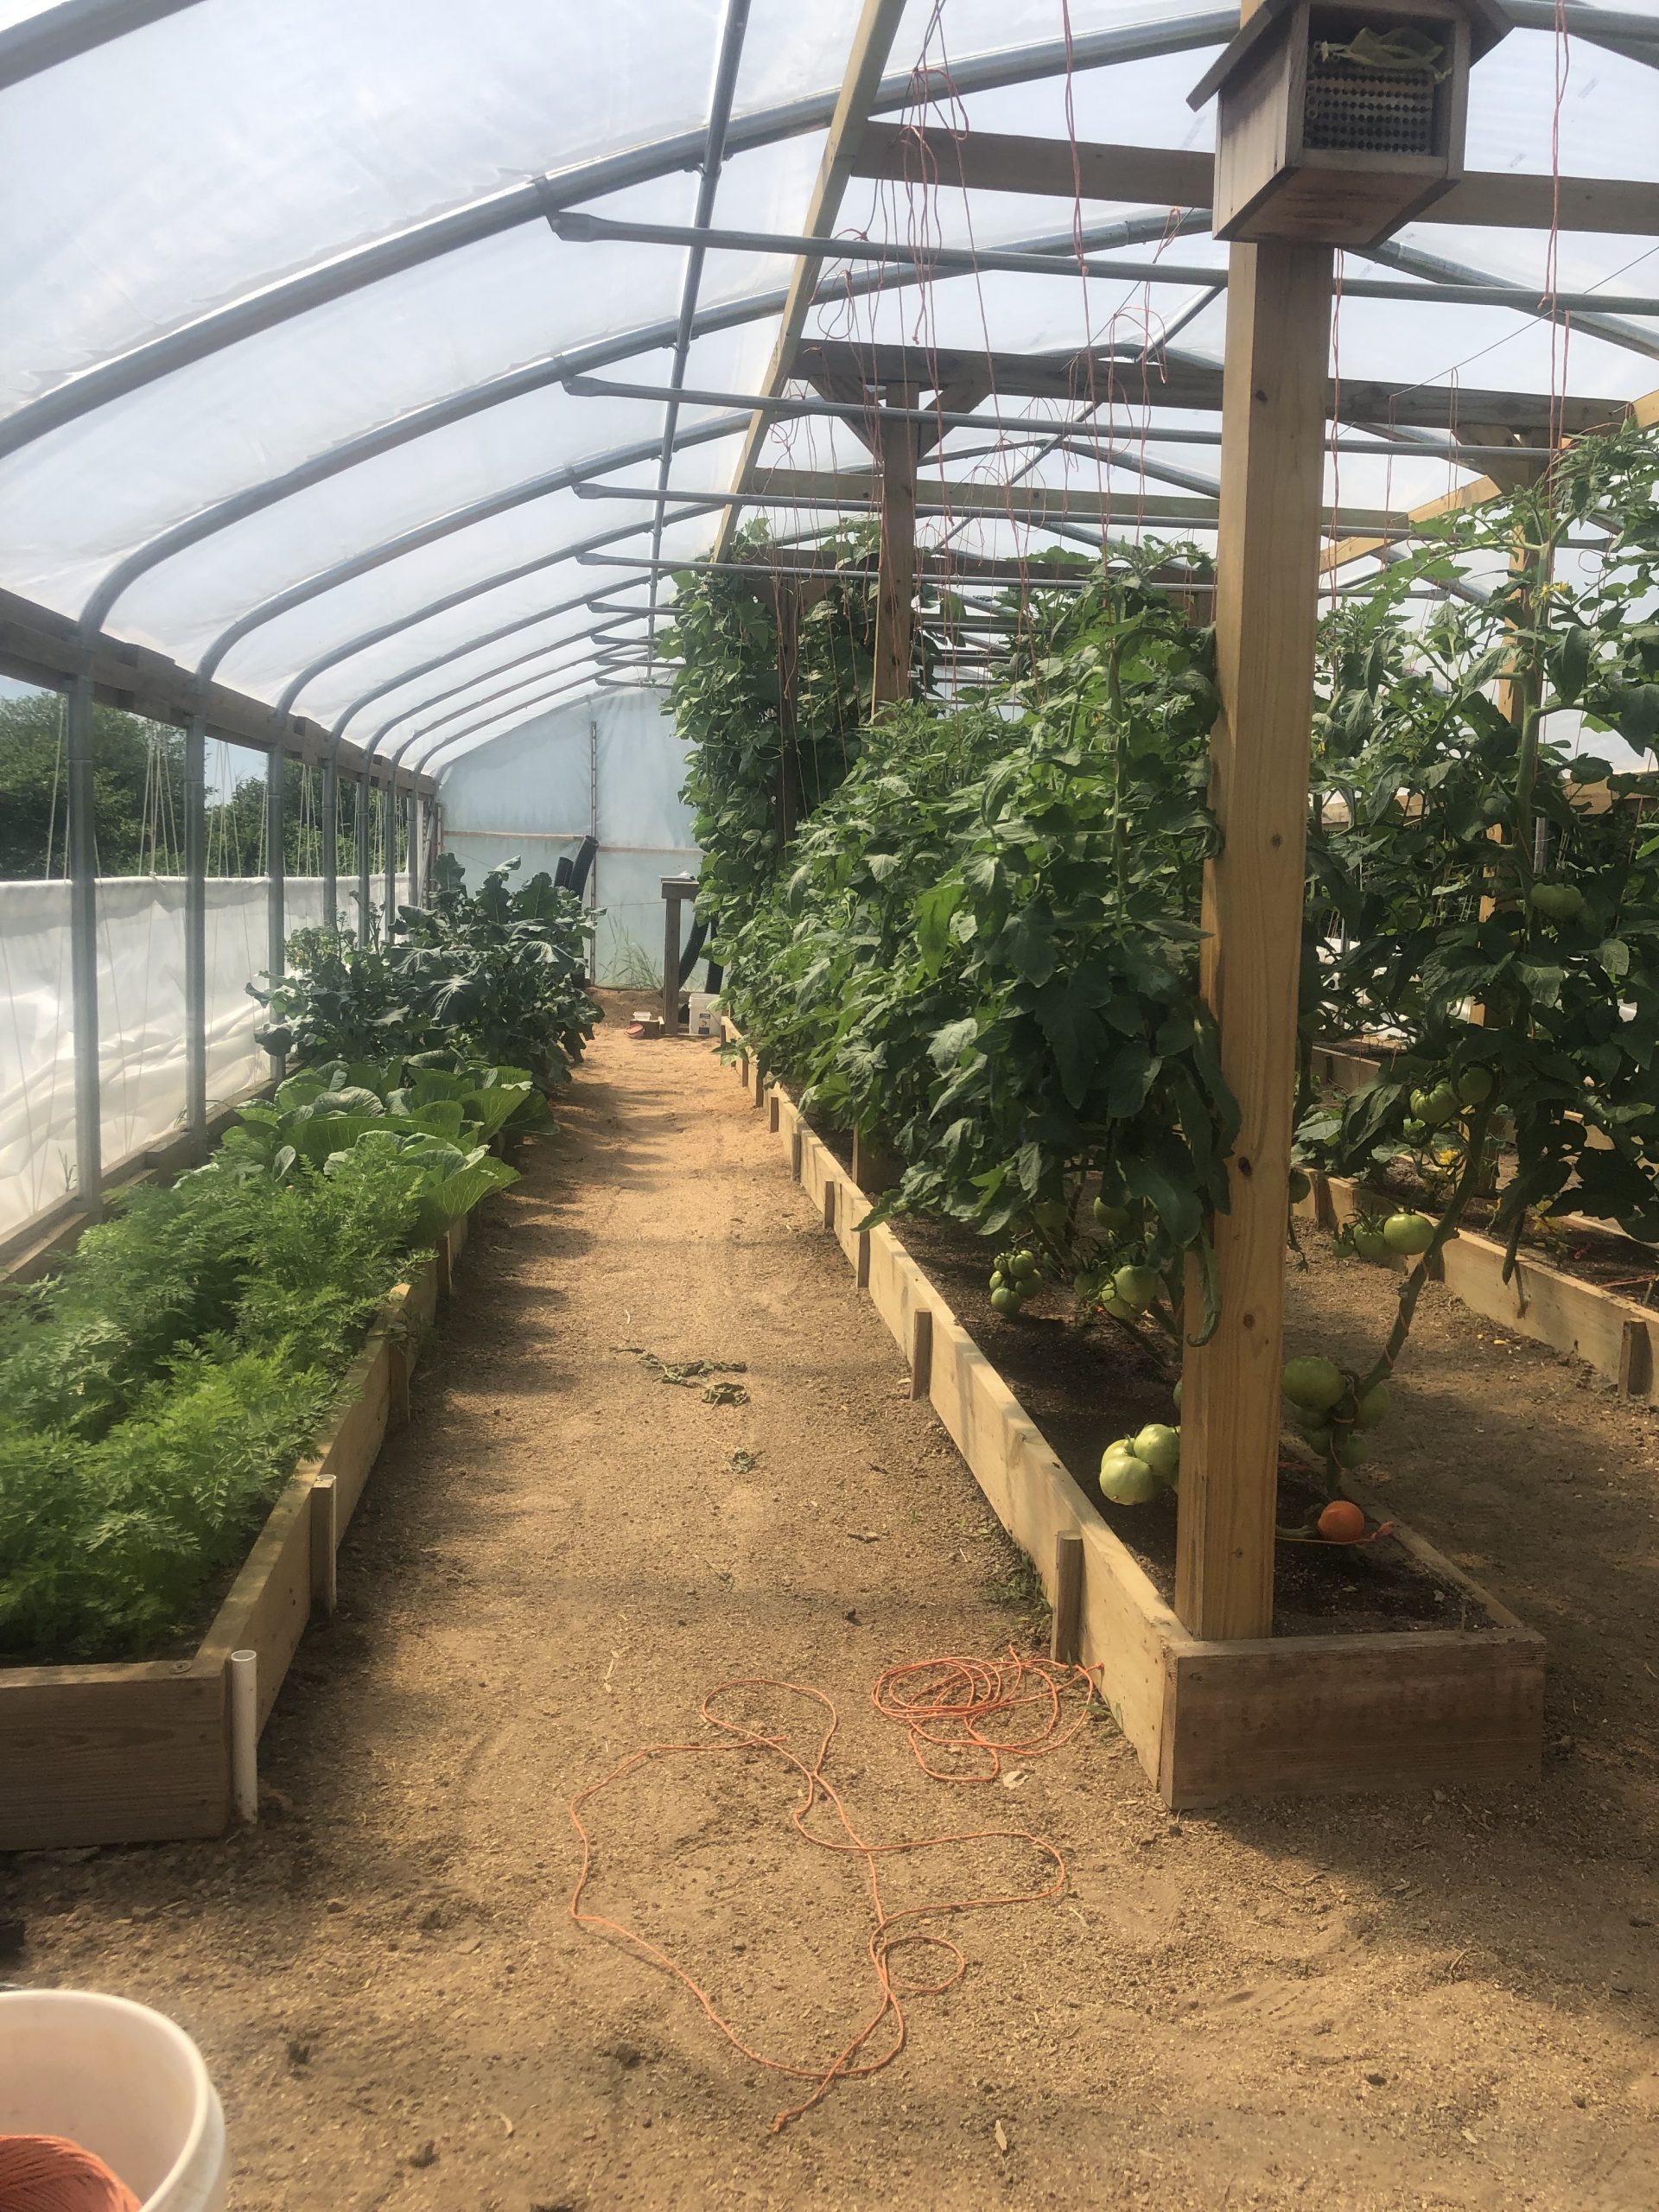
Prune a day or two before feeding this. This opens up the grow box/soil beds and gives you more room to apply the weekly feed. You can see the kale in the video and the picture below as an example. As the garden grows and the plants get bigger it becomes difficult to apply weekly feed without getting some on the plants. If left on the plant the weekly feed will burn the leaves. Simply rinse the leaves off with your watering wand. For garlic and onions, just shake the weekly feed over the plants and the entire growing area and water. For crops that are grown in two rows and get too big for you to easily apply weekly feed down the center of the rows, you will need to gently pull one side back far enough to apply the weekly feed. It can be a bit of a challenge, but you’ll get the hang of it pretty fast.

Rinse weekly feed off plants to prevent fertilizer burn
Once your crops get big it becomes a challenge to apply weekly feed without getting some fertilizer on the leaves. The above picture shows big plants that make this a challenge. If left on those leaves it will “burn” the plant where the fertilizer sits. The fertilizer will leave a small white spot around it where the burn has occurred. In some instances you can simply shake the leaf slightly to remove the fertilizer. Since it needs to be watered in anyway, generally I use the hose and our watering wand. This rinses the weekly feed off the plants and waters everything.
Our 2022 garden has begun
Our average last frost for the year has come and gone, it’s time to kick off our 2022 garden. We’ve made a short video for the occasion and quickly show the new garden site for this year. We also cover what we are going to be growing and show what’s already done.

This will be a demonstration garden
We are growing this garden on the property where classes are taught on how to grow a Mittleider garden. Those who attend classes this summer will have the opportunity and see and learn in this garden. Folks will have the opportunity to feed, water, care for the various plants, prune, harvest and enjoy meals provided with the food grown in this garden
Opportunities for locals from surrounding communities
Locals in the area will also be able to tour and see what a Mittleider garden looks like, ask questions and even chip in and learn along the way. Those who want to learn and benefit from “hands on” will have the chance to work in the garden with Heath
Video tour and specific plans for the garden
When to use weekly feed and preplant with seedlings
I have seen some confusion on how much and when to use nutrients in seedling trays while growing seedlings. I’ve made a short video (see below) that covers when to use weekly feed and preplant in seedling trays.
It is easy to determine which nutrients you will need. If you are placing seeds into a seedling tray, you only need preplant. If you are putting seedlings in a seedling tray, you will need preplant and weekly feed.
When adding preplant to a seedling tray, it is always 1.5 ounces of preplant to a full seedling tray. Weekly feed is 3/4 of an ounce to the full seedling tray. The preplant and weekly feed are added before transplanting the seedlings.
For those whose who do not use the Mittleider seedling tray
If using containers other than seedling trays, such as a seedling pot, you can easily calculate and add the correct amounts of nutrients. Place your growing medium into something like a tote that will allow you to measure how many cubic feet of growing medium you have. For every 1/2 cubic foot of growing medium, add 1.5 ounces of preplant and .75 ounces of weekly feed. Mix it in well and then transfer the mixture into your seedling pots.
Better seed germination in clay soil
If you have ever grown a garden in clay soil, you know it can be challenging. I have a few tips for you that will help give you better seed germination in your clay soil. Fortunately the steps to improve your germination rate in that clay soil are easy and have little to no cost. Following these steps will greatly increase your rate of germination.

Monitor soil temperatures
To improve your seeds germination rate in your gardens clay soil it is vital that you know your soil temperature. If you soil temperature is below 60 degrees Fahrenheit you will see little to no germination from your seeds. The optimum temperature range to increase the chance of germination is 75 to 80 degrees Fahrenheit. Planting your seeds at the ideal soil temperature will greatly increase your seed germination rate.
Ignore planting depth instructions on the package
The planting depth directions on the back of your packet of seeds is not ideal for those of us who have clay soil. Plant your seeds to a depth 2.5 times the thickness of your seed. The seed has enough nutrients in it to get that new seedling above the soil. If the seed is too deep it will run out of energy before breaking through the soil. Having to push through heavy clay soil can also stop that seed from ever sprouting. We will discuss that next.
Cover your seeds with sand
If you want to increase the chance of a seed to germinate in clay soil, cover it with sand. It is far easier for that seedling to push up through sand than your clay soil. Ideally you will want to use a concrete sand which has been washed. Washed concrete sand will have far less weed seed as compared to river sand.
Cover with burlap or shelf liner
Once your seeds are planted and cover with sand, cover your sand with burlap or shelf liner. This will so 2 important things. First, the covering is going to protect the seed from birds and ensure it stays covered with sand. Secondly, it acts as a diffuser to help keep the seed from becoming dislodged from rain or while watering.
Water those seeds
After you seeds are covered with sand and burlap/shelf liner be sure to gently water to make sure the seed is moist. You have to keep that seed moist if you want it to germinate. Monitor your soil daily to ensure it remains moist. Water as necessary.
An easy way to plant tiny seeds in clay soil
If you are putting tiny seeds such as carrot in your clay soil there is an easy way to do it. We cover planting tiny seeds in another blog post. Be sure to check it out.
Here is the video
For those of you who learn by seeing, here is the video. Watch it and you can see how you can get better seed germination in your clay soil. While you’re there be sure to like and subscribe. You can find us on social media from this page. Thanks!
Mittleider gardening season 2021
We are a little late getting the Mittleider garden started for the 2021 gardening season, but it is now half done. We have published a video, linked below, detailing what we have growing in the greenhouse. The greenhouse will have a full bed of potatoes, 3/4s of a bed of onions. The remaining available space will be filled with tomatoes, pole beans, cucumbers, bell peppers, jalapeno peppers, kale, cauliflower, broccoli, carrots, parsnip, brussel sprouts and cabbage. If you’re interested, we will be doing garden tours every few weeks.
Mittleider garden in the soil
In addition to the 4 grow boxes inside the greenhouse, we will also be gardening in four Mittleider soil beds. Our average last day of frost is April 15, we will not be planting anything in the soil until after that date. In the Mittleider soil beds we will be growing different varieties of tomatoes and pole beans. Other crops include okra, more peppers, malabar spinach, and lots more onions. Watch the blog and our social media for content on our soil bed gardens to come in the future.
Mittleider garden tour video
Here is a video tour of the crops we have planted in our greenhouse and a discussion on our goals for the Mittleider gardening season for 2021. Our soil bed garden will be planted after our average last day of frost is in the middle of April. You can expect to see videos and more content on our soil bed garden in the future.
Want to find us on social media? You can get details on the About Us page.
Mittleider gardening classes for April 2021
Mr. Jim Kennard has announced he will be holding the Mittleider “boot camp” training April 12 through 17, 2021. The training is at his facility and includes meals and lodging during the training. You can find all the details and register for the class at Jim’s website GrowFood.com.

Where are the Mittleider gardening classes held?
The Mittleider gardening training is held at the Food For Everyone Foundation’s Preparedness University campus, located at 961 E 5th St, in Kidder, Missouri 64649. Kidder is located approximately 60 miles north west of the Kansas City International airport.
How to plant tiny seeds easily
Trying to plant tiny seeds such as carrots can be difficult. If you have planted them before, you know how difficult it can be to get the spacing correct. The process is often wasteful and more than a little frustrating. Let me help make this process so much easier.
How is it made easier?
The process is made easier by helping to control how many seeds are applied in the garden. It is a simple and inexpensive method where you will add a small measured amount of the seeds to a larger measured amount of sand. Once the seeds are well distributed within the sand you can easily plant those tiny seeds my shaking out the mixture.
What do you need to plant tiny seeds easily
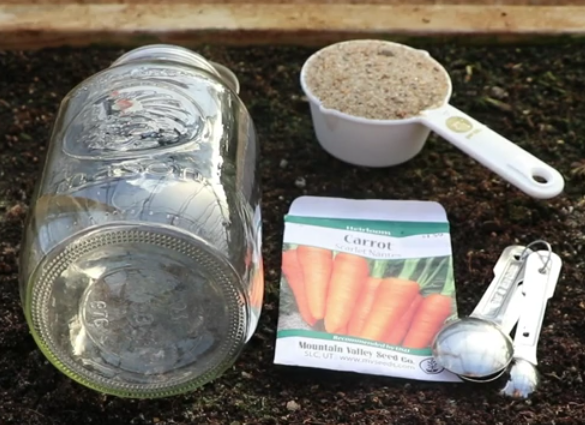
You are going to need a couple common measuring devices found in you kitchen, dry washed concrete sand, your seed and a clean container such as a common pint sized mason jar. You are about to be able to plant your tiny seeds easily!

The mixing ratio
The mixing ratio is simple. One part seeds go into 100 parts of sand. To make it a little easier for you, 1/4 of a teaspoon of seed is added to 1/2 cup of sand. Look for my video on the topic below to see the process.
Why you should use washed concrete sand
Sand from a river, or a road, is going to have a fair amount of weed seeds in it. If you use that sand you will be introducing more weeds to your garden and competition for the seeds you want to grow. Washed concrete sand has far less seeds and other foreign objects in it.
Find us on social media!
Today we are transplanting onions into our garden. We will detail the number or rows and the spacing requirements for onions in a Mittleider garden. There will be a couple picture showing the process and the onion seedlings.
Spacing and row requirements
These are onions we started from seeds and are ready to be transplanted. Onions in a Mittleider garden are grown in 4 rows with 4 inches of spacing. In a 30 foot bed you can expect to yield 362 onions. In the picture below you can see transplanted onion seedlings in the correct number of rows and spacing.

We have always had great success with starting our onions from seeds. We have had a higher success rate come harvest time with our own onions starts as compared to buying store bought bulbs. The seedlings are easy to transplant into the garden and you can get a lot of them into a small amount of space.
Do onions tolerate the cold and how long to grow?
Onions are a hardy crop and tolerate cold weather well. With the average 85 days to maturity for most onions we like to grow two crops. The first crop is grown in the spring, the second in the fall. In our soil beds I add onions in the spring to the garlic I started in the previous fall.
We use a lot of onions in our home. When I harvest the onions from the soil bed shared with the garlic are replaced with the fall batch of onions. The fall batch are grown from seeds and transplanted into the garden. Transplanting a seedling instead of putting the seed directly in the garden will result in a larger yield.
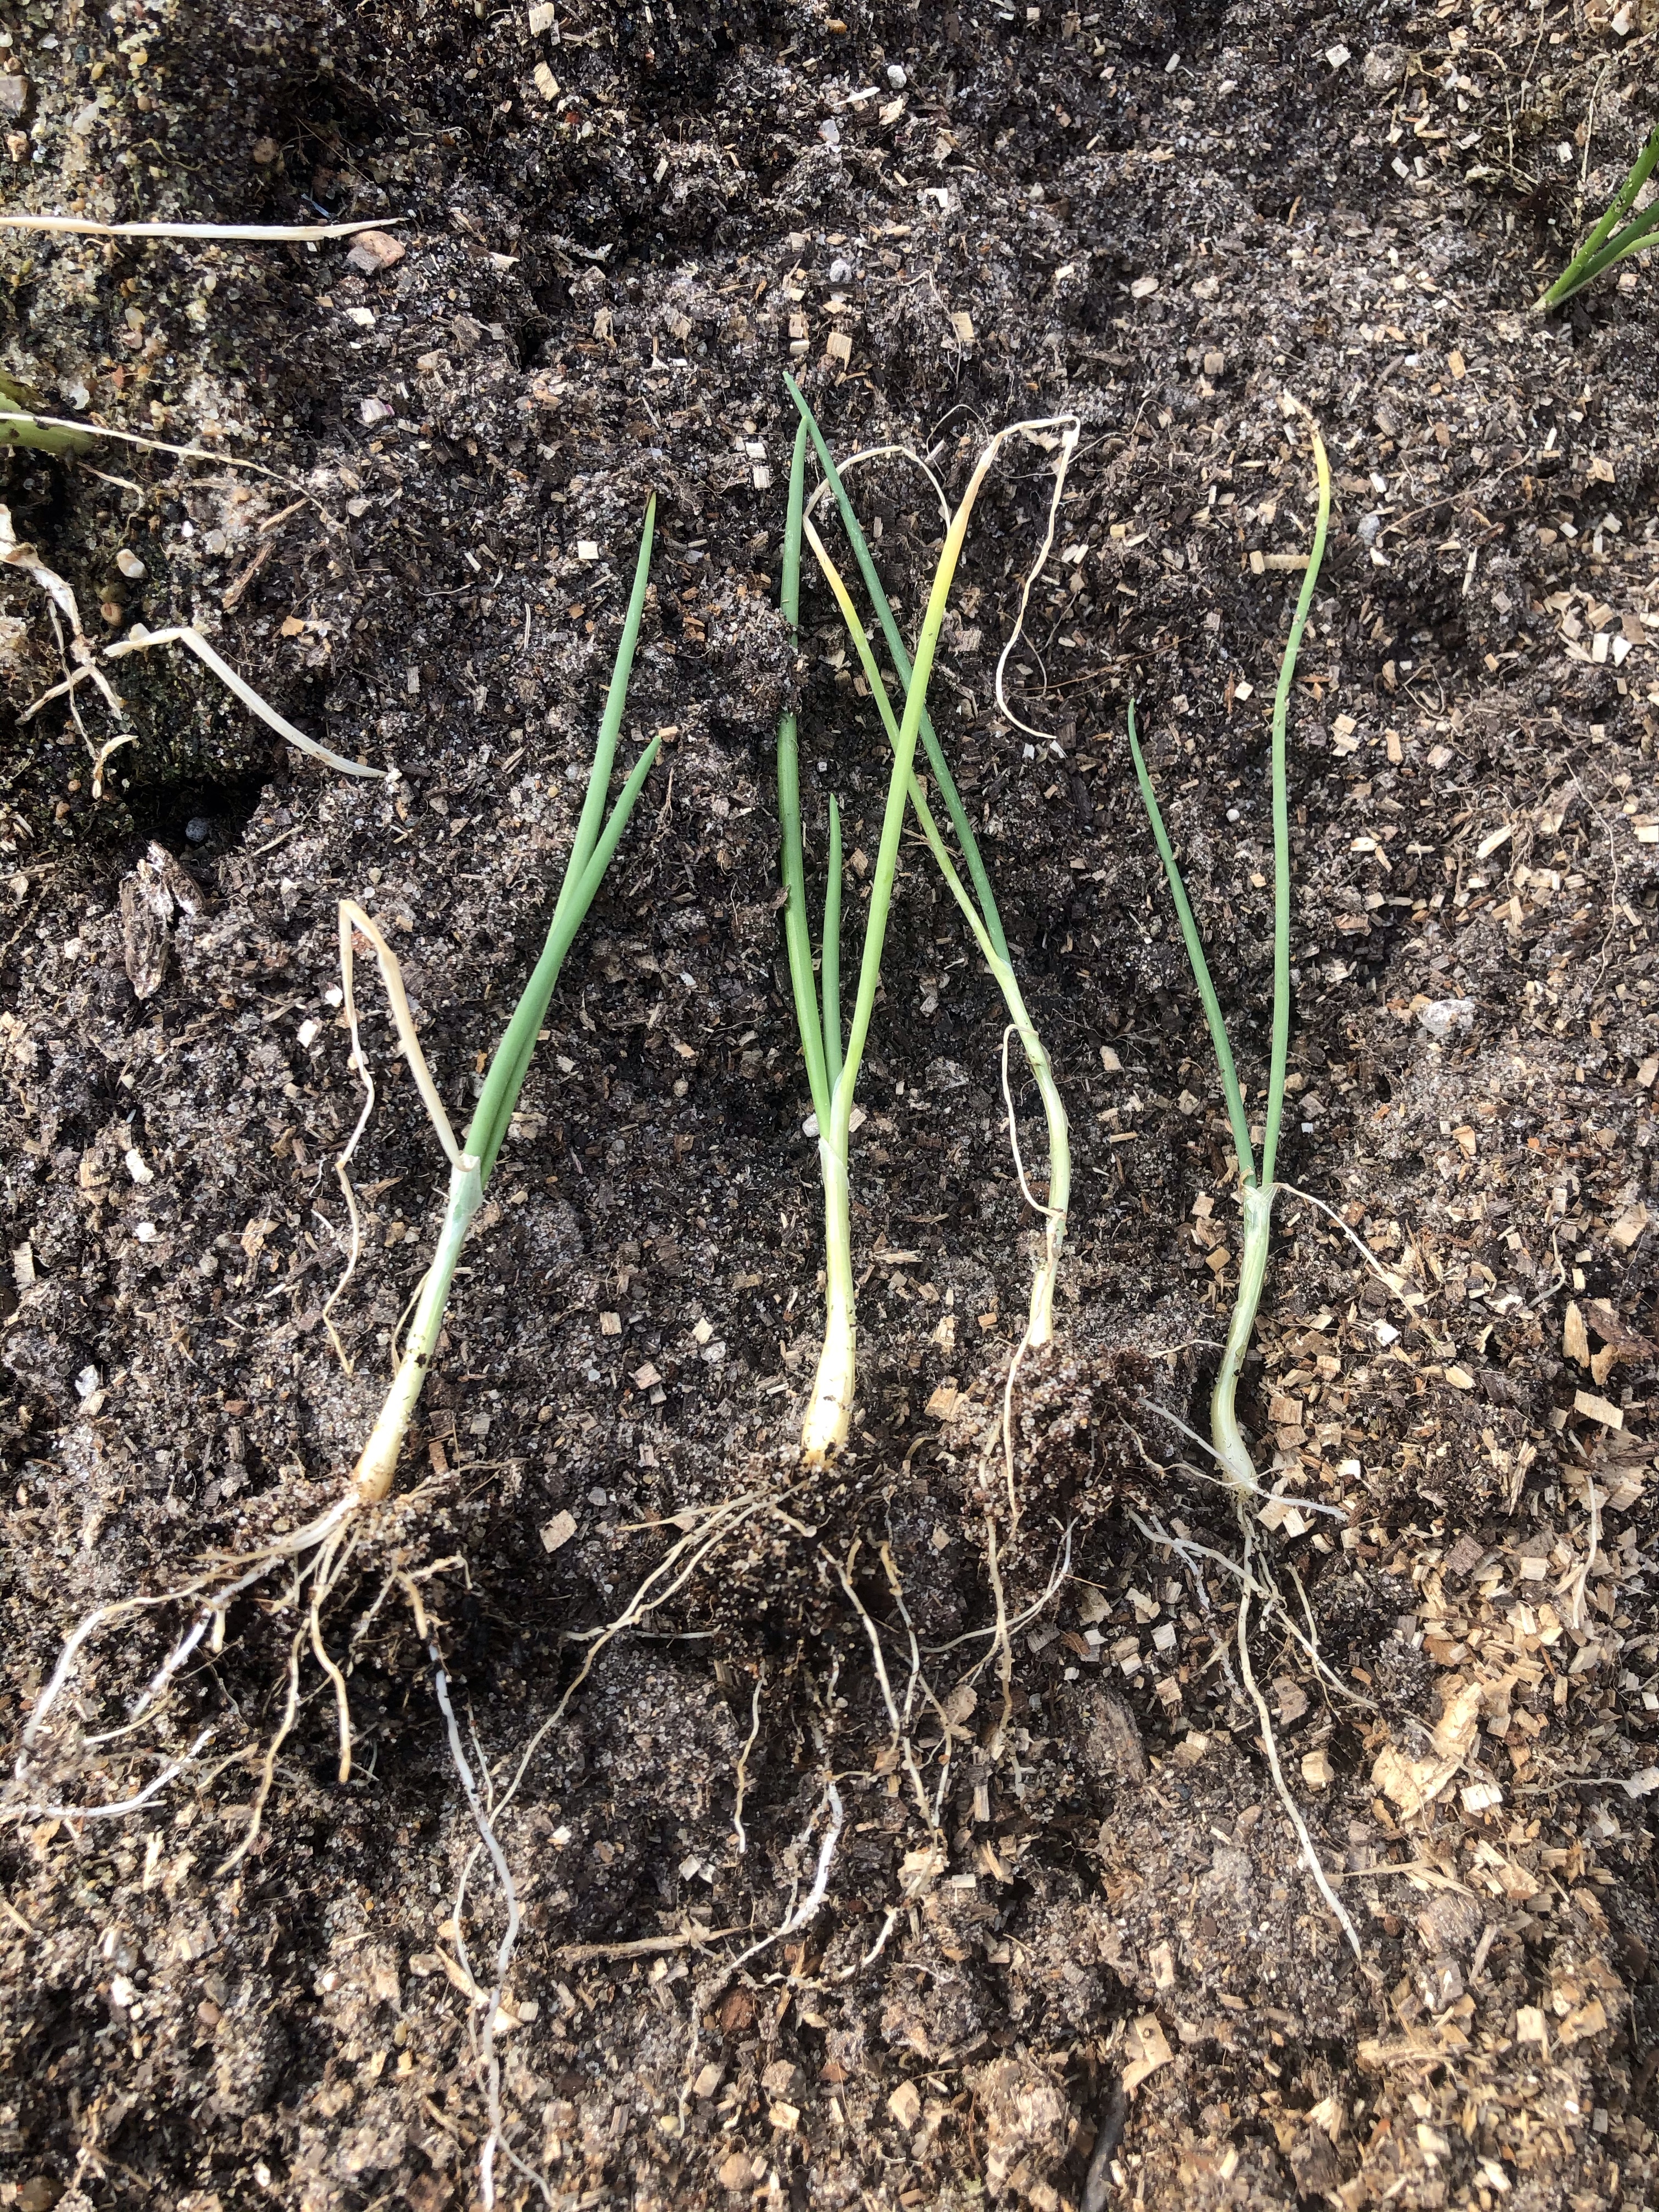
Here is a picture of our onion seedlings before transplanting.

My name is Heath and I am a Mittleider Gardener. I have been a Mittleider gardener since 2015 and am a certified Master Mittleider gardener. I will be sharing pictures and information about the Mittleider garden we grow here in NW Missouri.
If you’re interested in the Mittleider Gardening Method (MGM) or looking for information about it, be sure to look around. We will be posting videos, articles and just some random pictures showing different aspects of our Mittleider gardens.

Our social media
